
Steps to creating PowerShell script for Temp file deletion for Venio Web
Step 1
- Search for Windows PowerShell ISE
- Right-click and select Run as Administrator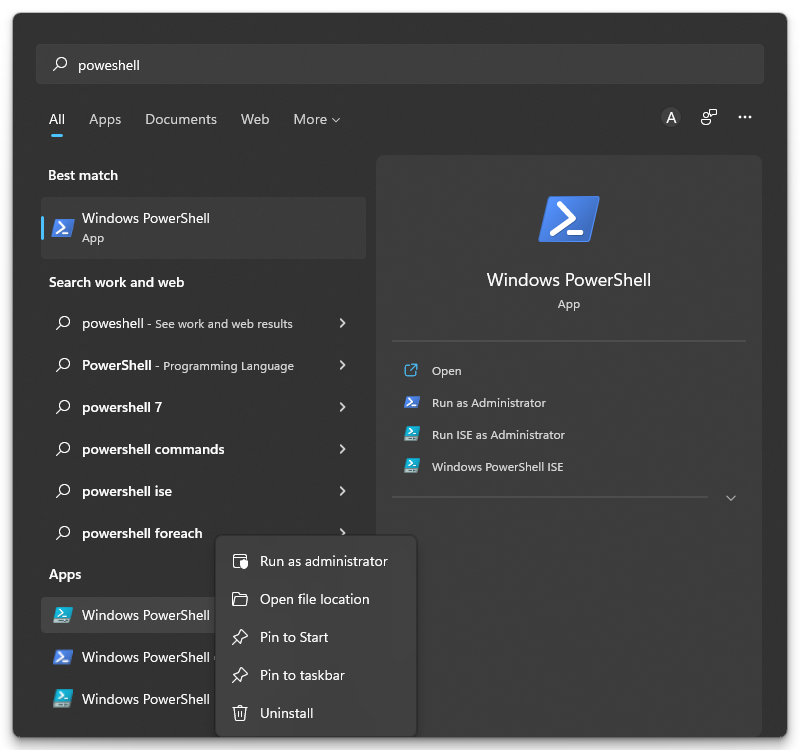
Step 2
- Run the following Command within PowerShell
set-ExecutionPolicy unrestricted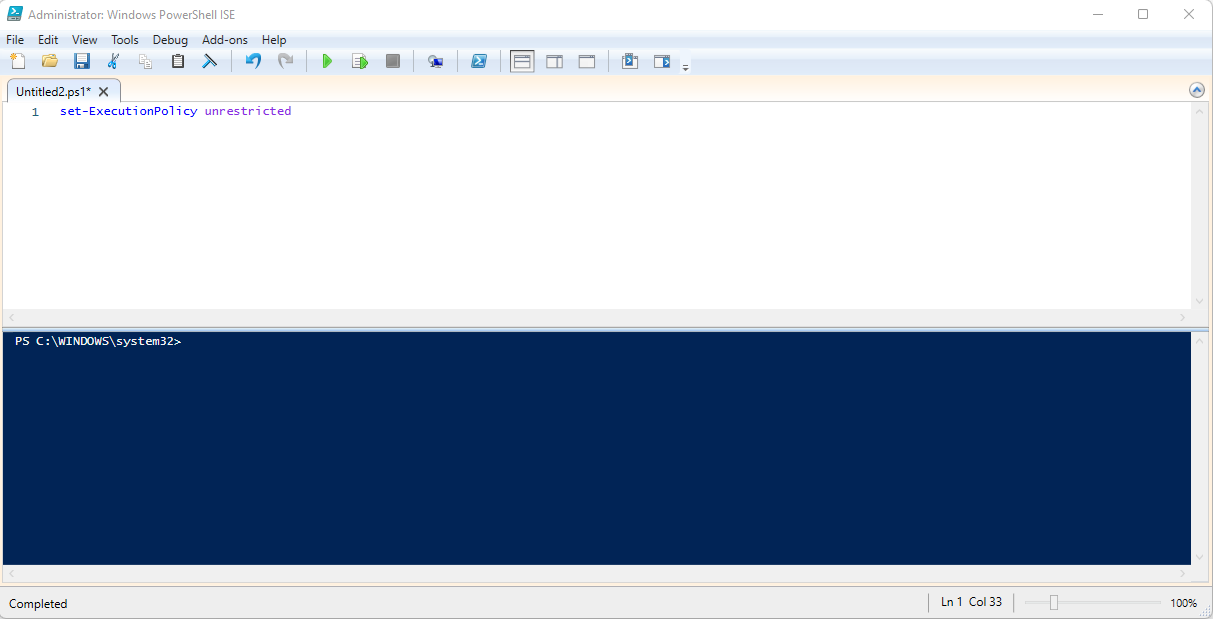
- A pop-up window will display and select Yes to All
Step 3 Create the following PowerShell Script
- Command
- Remove-Item "Replace with UNC file Path" \* -Recurse -Force
- Save the file in a location that PowerShell has rights to run the PS1 file
Step 4 Create a Windows Task Scheduler job
- Open Windows Task Scheduler
- Right-click on Task Scheduler Library
- Select Create Basic Task
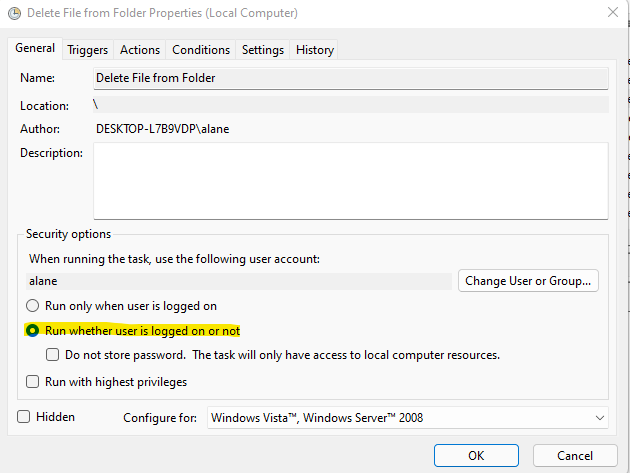
Step 5 Configuration of the Task
- In the general Tab select the following option
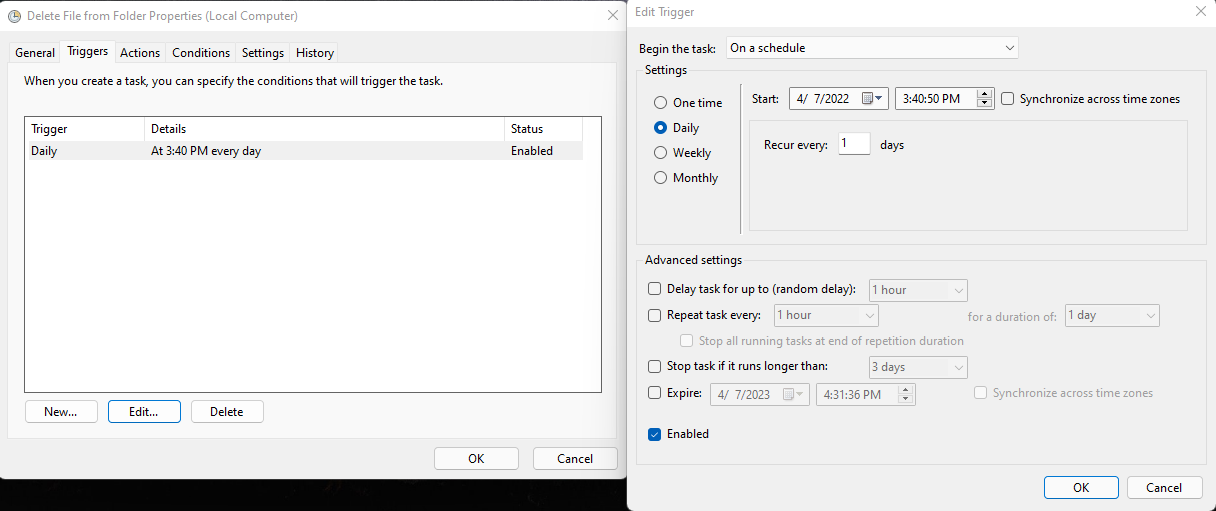
- Configure your Tigger schedule
- This step will be up to your business needs
- After completing your configuration of triggers select Actions
- Select new Action
- Make sure Action is set to Start a program
- Under setting > Program/Script enter the following information
(powershell.exe) < Remover the brackets
- Under "Add arguments (Optional) Type in the following
-ExecutionPolicy Bypass "Replace with your PowerShell script UNC path.ps1"
- Example: -ExecutionPolicy Bypass "C:\Users\alane\Documents\Delete_TempFile.ps1"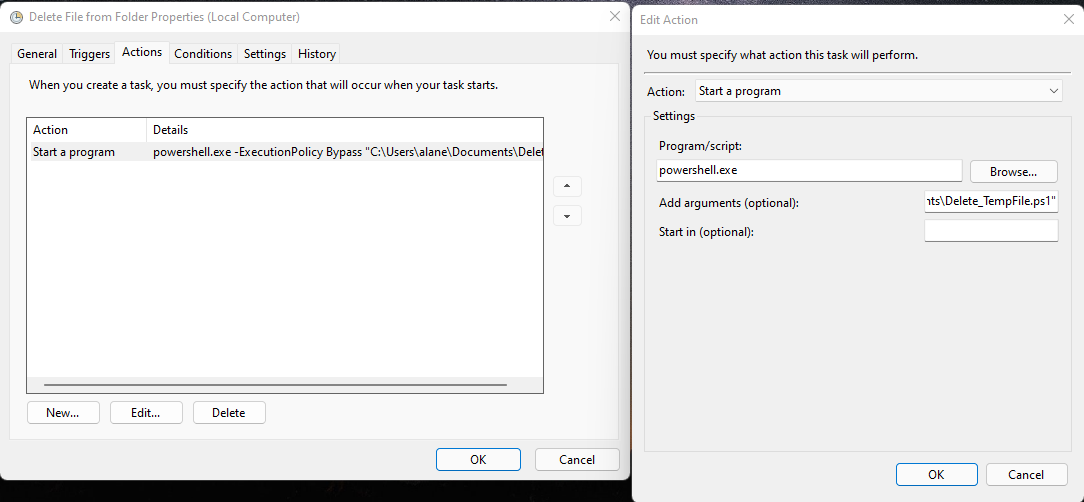
Leave Conditions, Settings at default unless you would like to add or remove option bases of your firm's security practices.
After you have completed all the configuration Windows Task Scheduler will prompt for a Under account and Password to save the the configuration and to which account this task will run as. (Best practices is to use a Service account that can be tracked and not tied to an individual user. )
Step 6. Execute the script to ensure it's working.
Once you have confirmed that the task is configured and running as scripted you are finished and your Venio Web Temp directory will be cleaned up as needed by your Scheduled Task
Comments
0 comments
Please sign in to leave a comment.